How to implement extended audit logging in dataverse Part 1
- 6 minutes read - 1150 wordsBackground
I had a requirement where the standard Dataverse auditing was not enough, the business also wanted to see who has been reading a specific record. so I came up with two different ways to solve this problem, in this blog post I will show one solution using Microsoft Purview compliance portal and Office 365 Management API to get data and embed a Power BI visualization in Dataverse. In part 2 I will show a different approach to achieve the same goal.
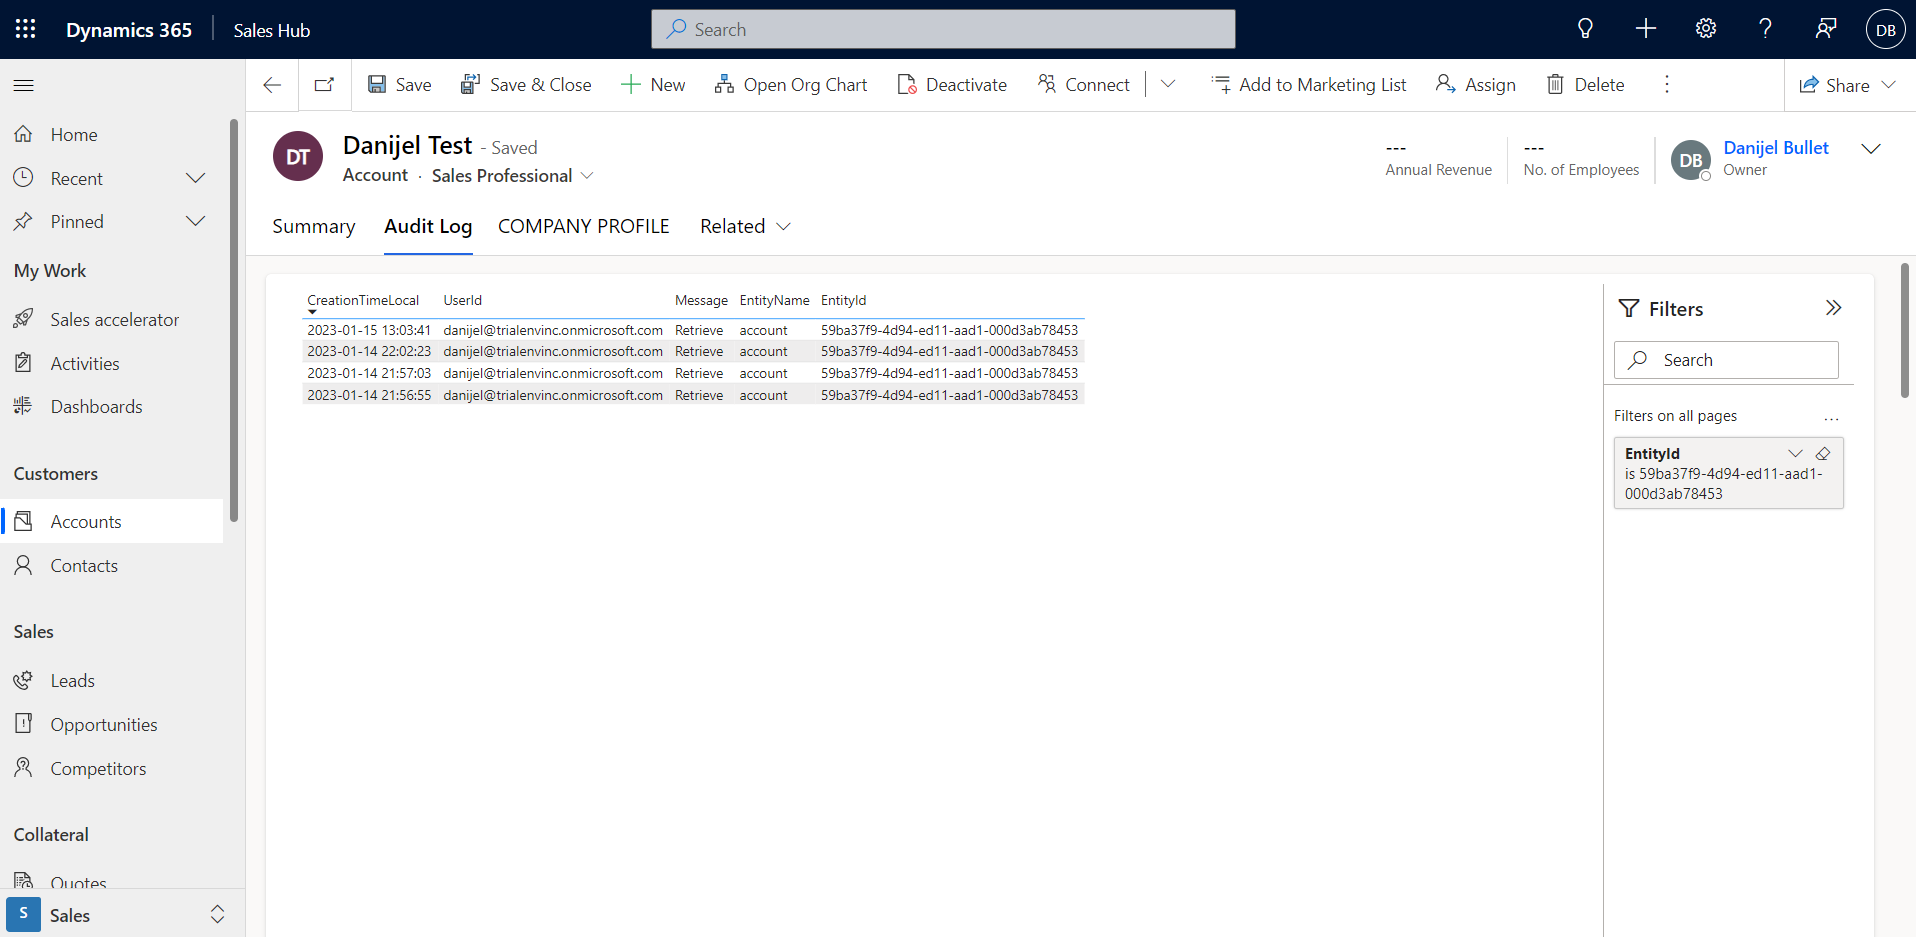
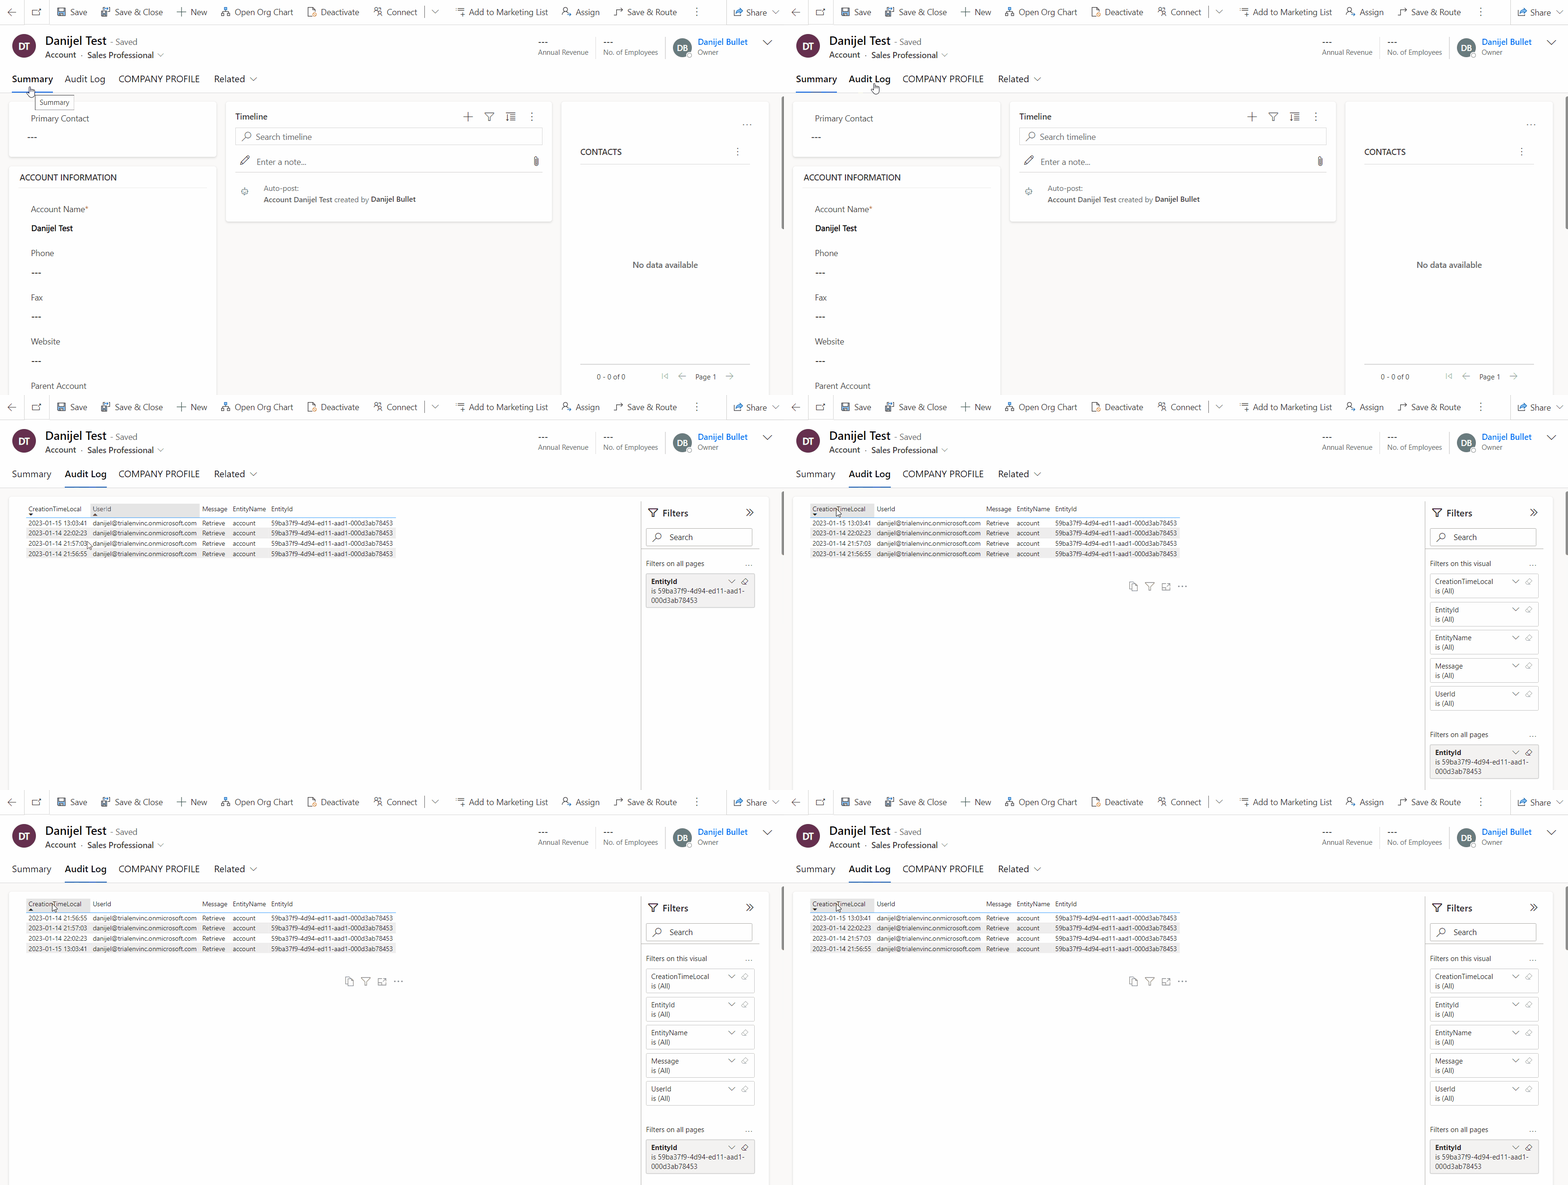 The end result in Dataverse, we are able to see who has been reading a record.
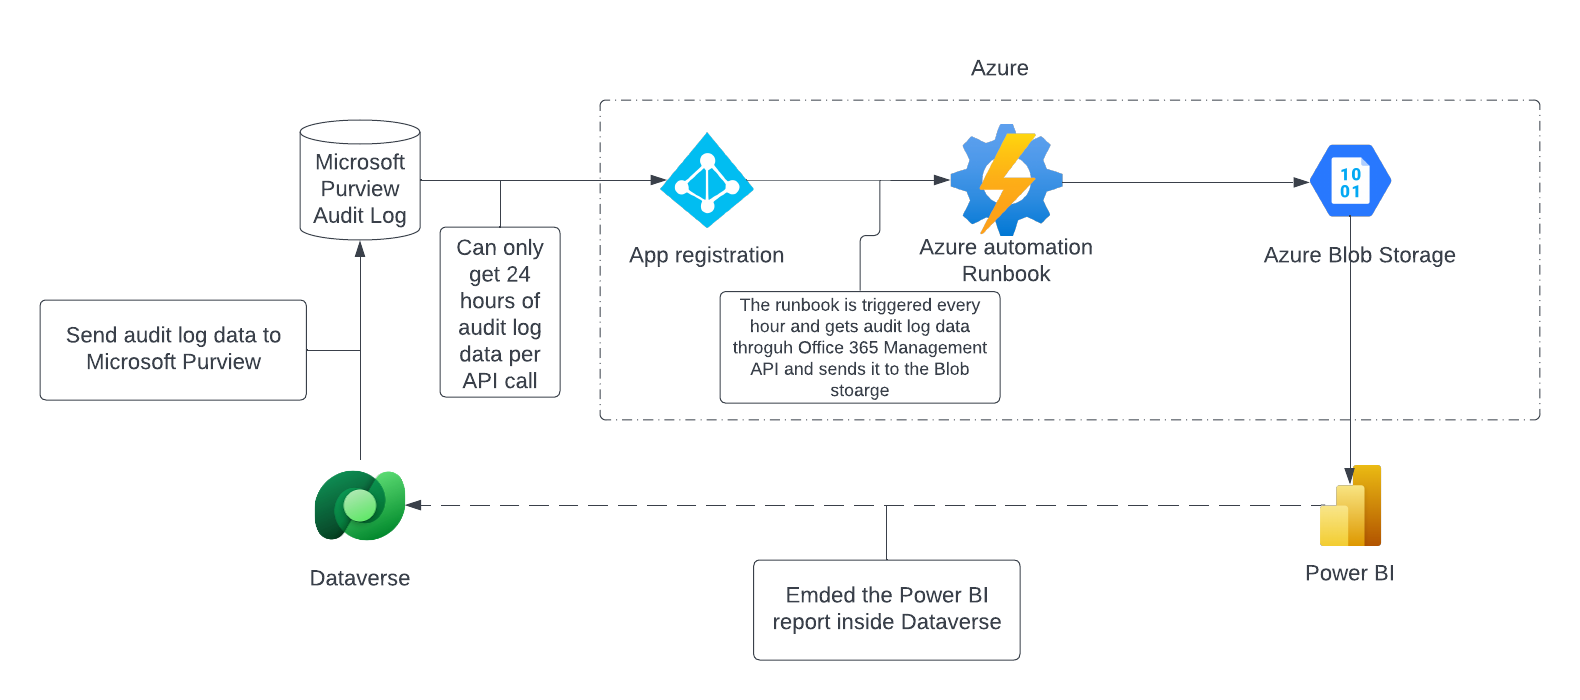 This chart shows what we are trying to accomplish in this post.
Enable Audit logging in datverse
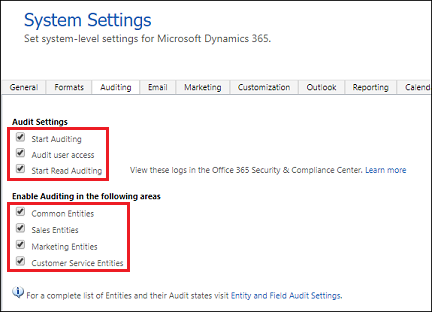
In order to activate the comprehensive auditing, from Dataverse to Microsoft Purview, we need to enable Auditing in dataverse. More specifically, for this scenario we need to enable Start Auditing and Start Read Auditing.
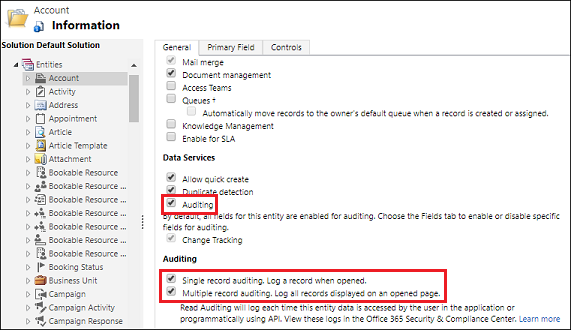
Next we need to activate the auditing for the specific tables that we want to audit. In my case I will activate this for the account table, so we need to enable “Auditing” on the table as well as “Single record auditing” to log Retrieve events - when a user opens a record - and “Multiple record auditing” to log RetrieveMultiple events in dataverse. RetrieveMultiple events occur when a user opens up a view with records, or a subgrid on a form. If you need to know more, go here.
Enable Audit logging in Office
To check if audit logging is enabled in Microsoft Purview compliance portal, log in and run the following command in powershell:
Connect-ExchangeOnline -UserPrincipalName danijel@organisationname.onmicrosoft.com
Get-AdminAuditLogConfig | FL UnifiedAuditLogIngestionEnabled
If this command returns false, run the following command to enable the logging:
Set-AdminAuditLogConfig -UnifiedAuditLogIngestionEnabled $true
Lastly, make sure you actually see som data being logged inside Microsoft Purview.
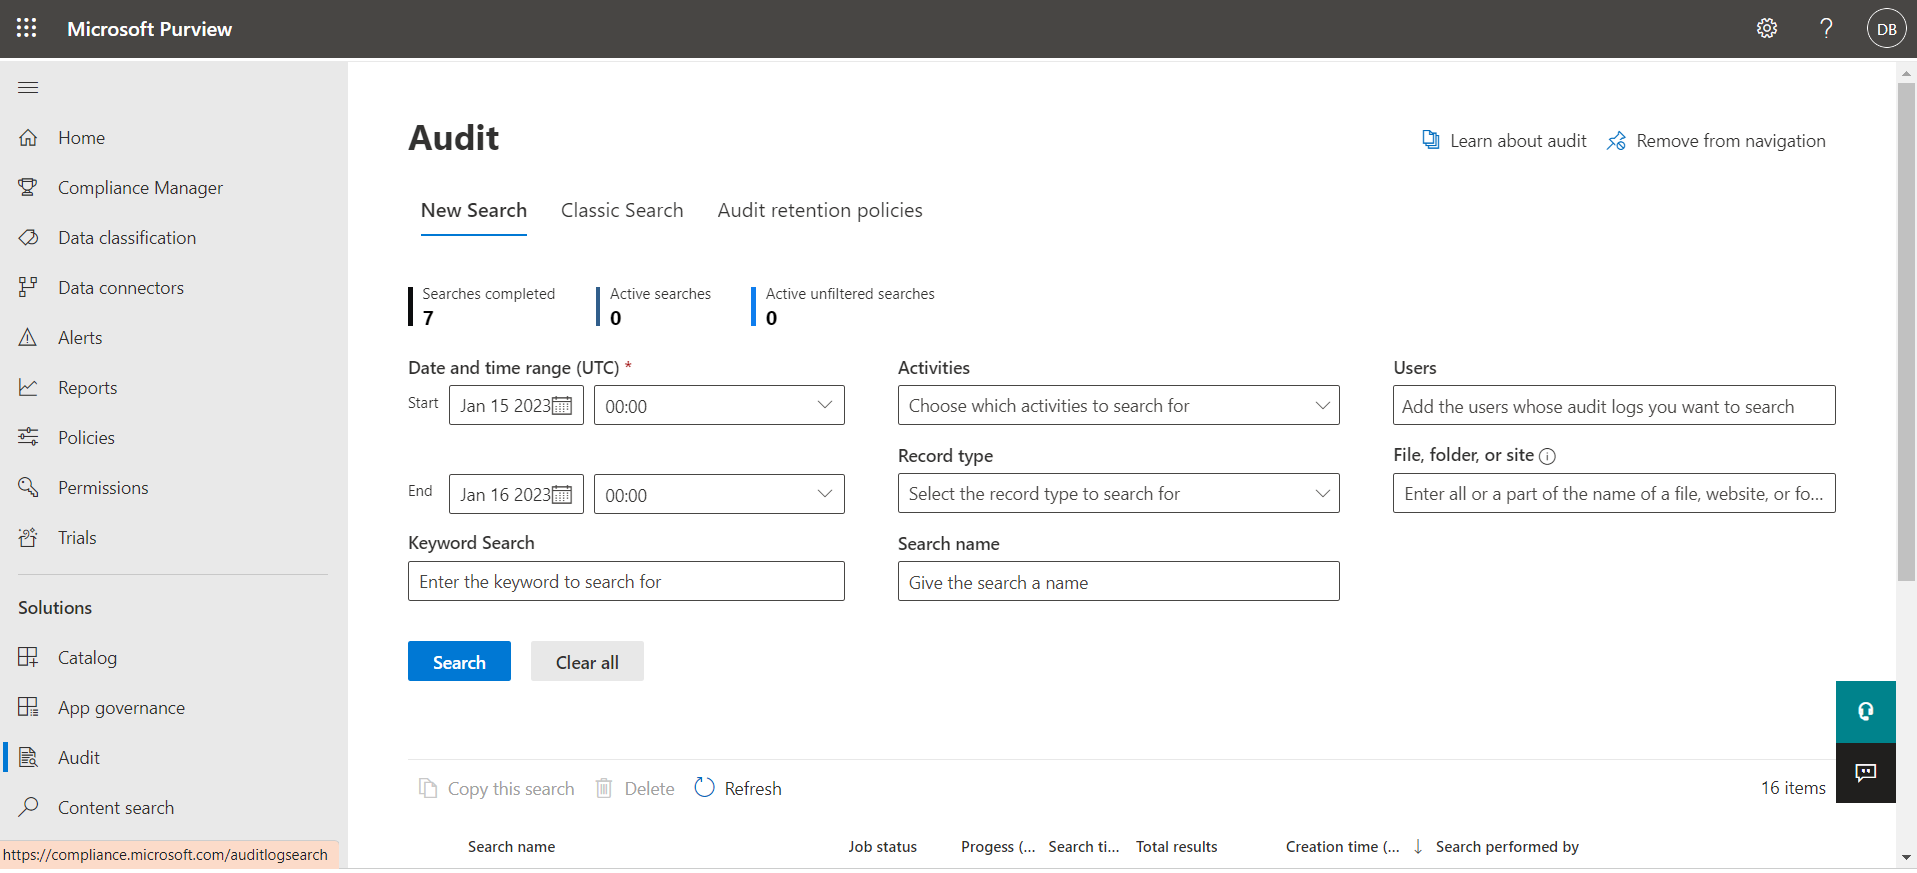
2. Set up Office 365 Management API
App registration in Azure
Next, lets go to App registration in Azure and create a new Application in order to access the O365 Management API. The documentation has a good explanation for how to set this up.
Note: Make sure to give the application both Delegated permissions and Application Permissions in Office 365 Management API. I made the mistake of forgetting to set both on my first attempt.
3. Create a storage account in Azure
Next we need to create a storage account, I picked a LRS Cool tier storage. Cool tier means the data is cheaper to store but more expensive to access. Hot is the opposite, cheaper to access but more expensive to store. So if you need to access your data frequently a hot storage might be more suitable. For more detailed information about setting up storage accounts refer to the docs.
4. Write a powershell script and run it in Azure runbooks
Now we need to get the data from the Audit log through using the Application that we registered earlier and leveraging its access to the Office 365 Management API. This will be done with a powershell script that we will run on schedule every hour.
Write a powershell script
I got the basis for my Powershell script from Walid Elmorsy’s blog post. His script calls the API and stores the files as JSON-files on the client PC. I modified it slightly so that the script can connect to an existing Storage Account and drop of the JSON-files to the blob-storage.
Create an Azure runbooks job
The script is supposed to be run once every hour. In order to do this we need to create an Automation Account in Azure. A good guide on how to do this can be found here. Make sure to create the Automation account as a system-assigned managed identity, this can also be done after you created the account by enabling this switch in the identity settings.
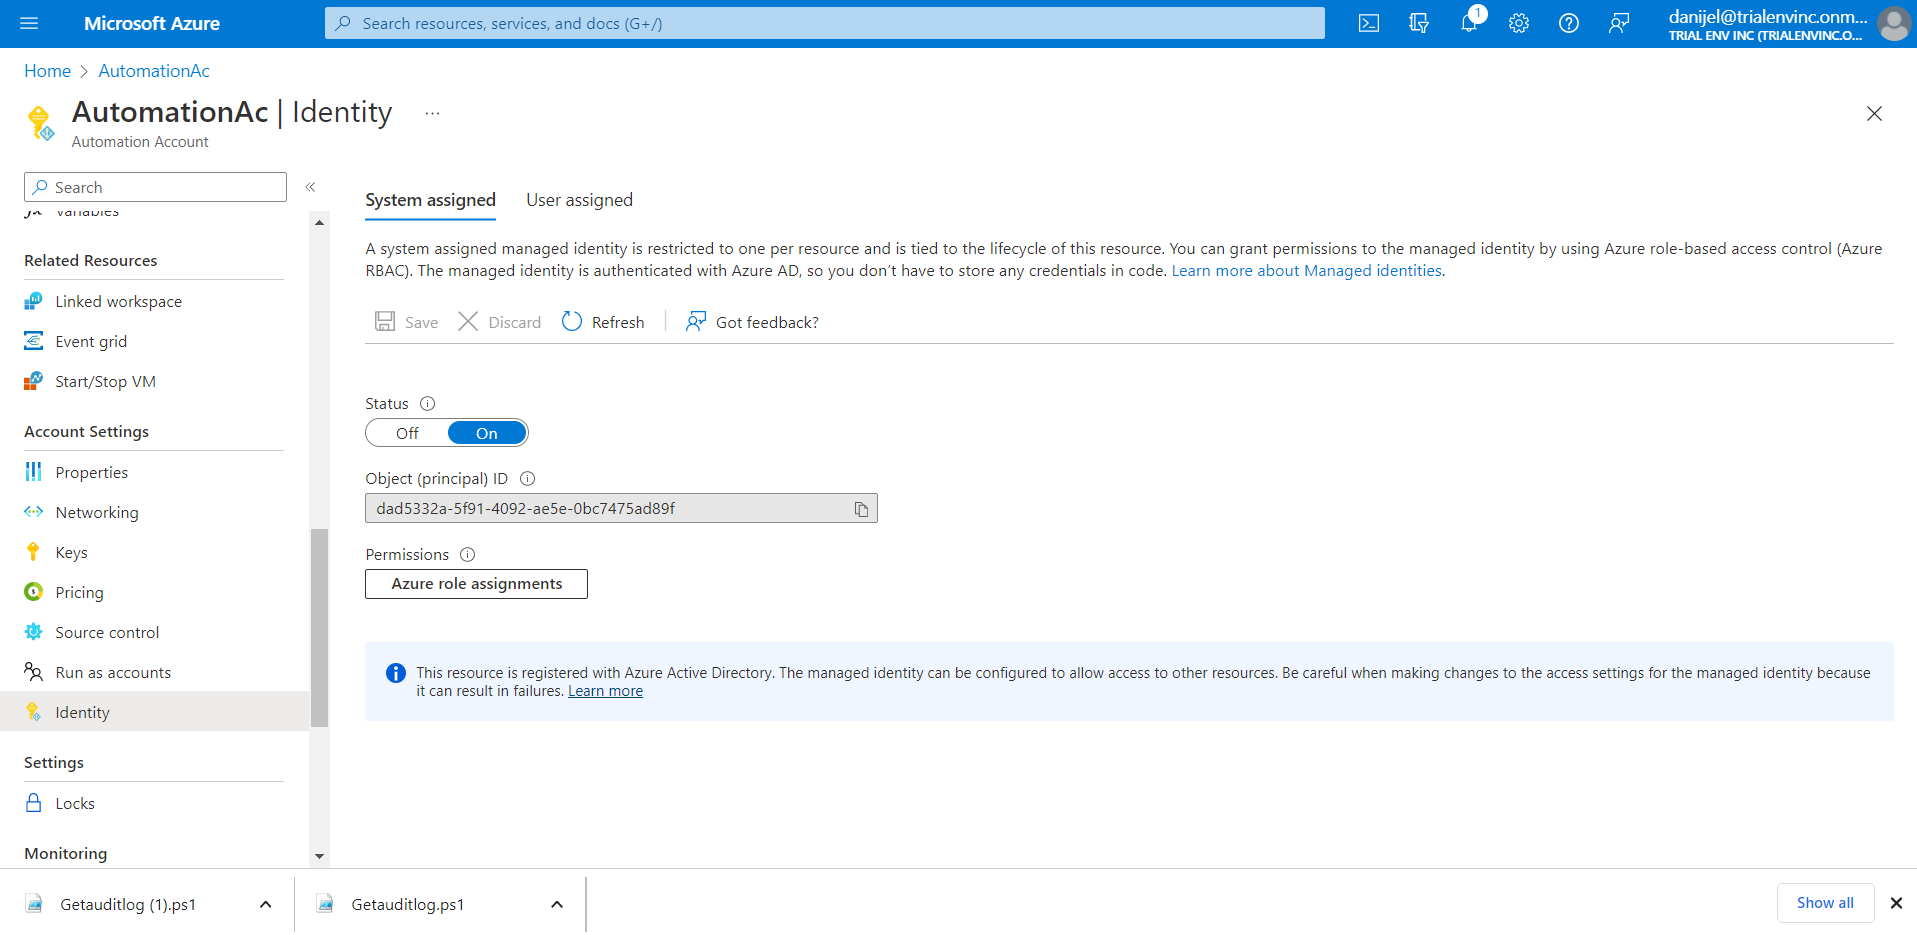
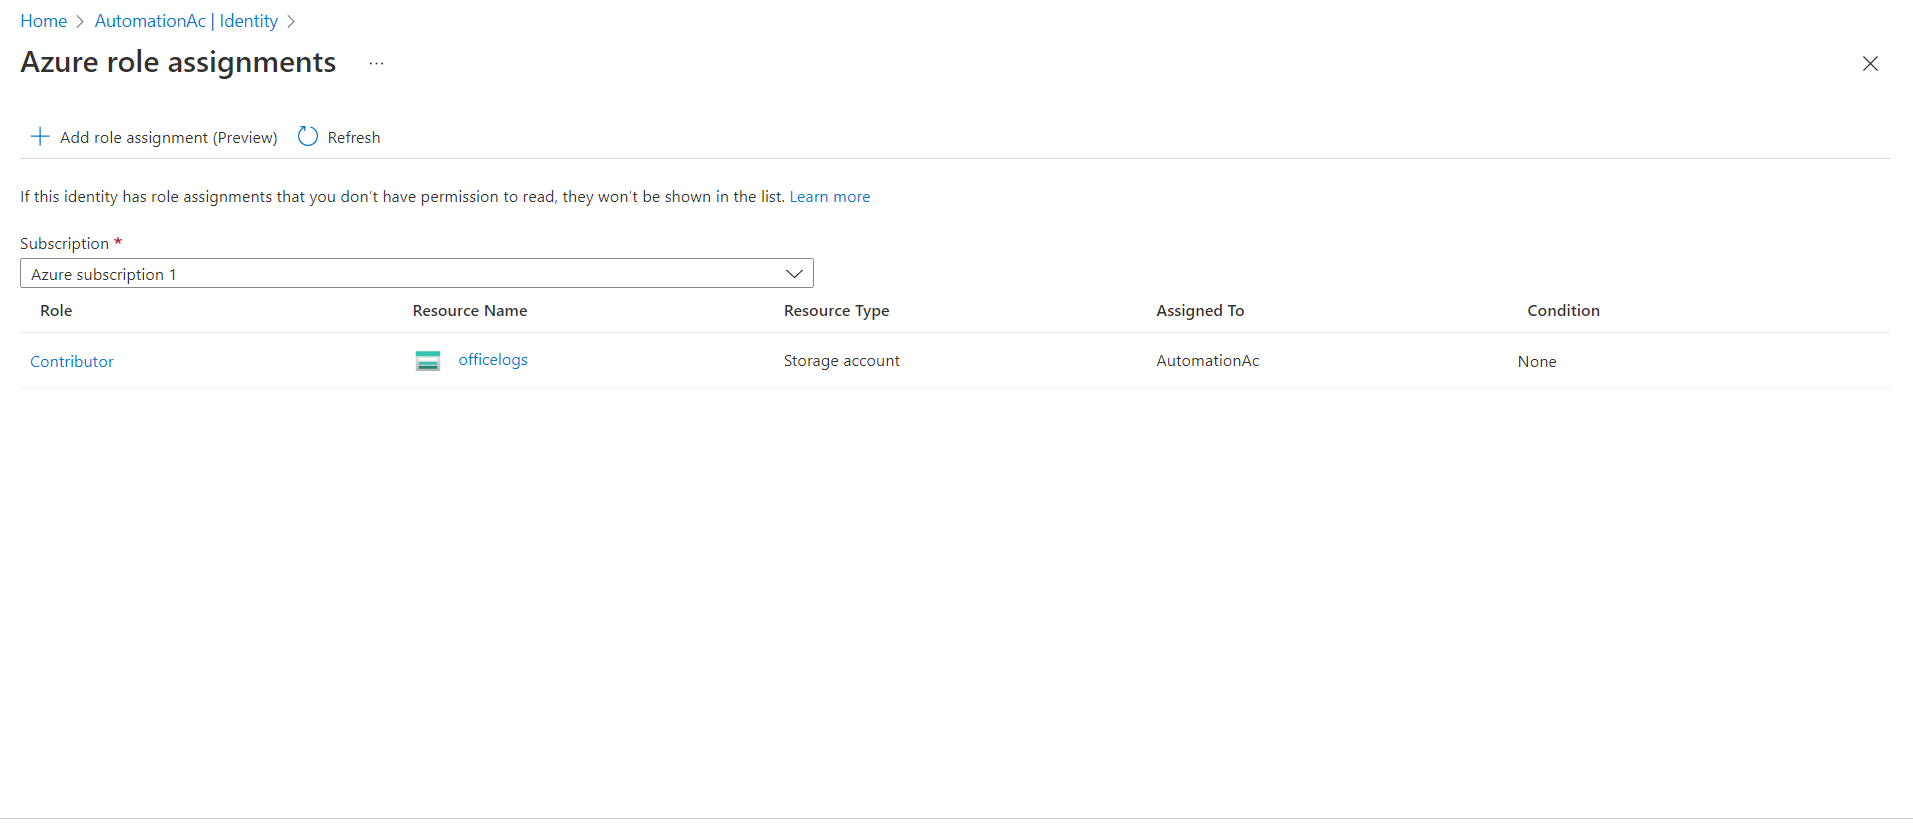
We also need to make sure to give the automation account proper privileges, our account needs to be able to write to the storage account, so I gave it contributor permission on the storage account we created earlier.
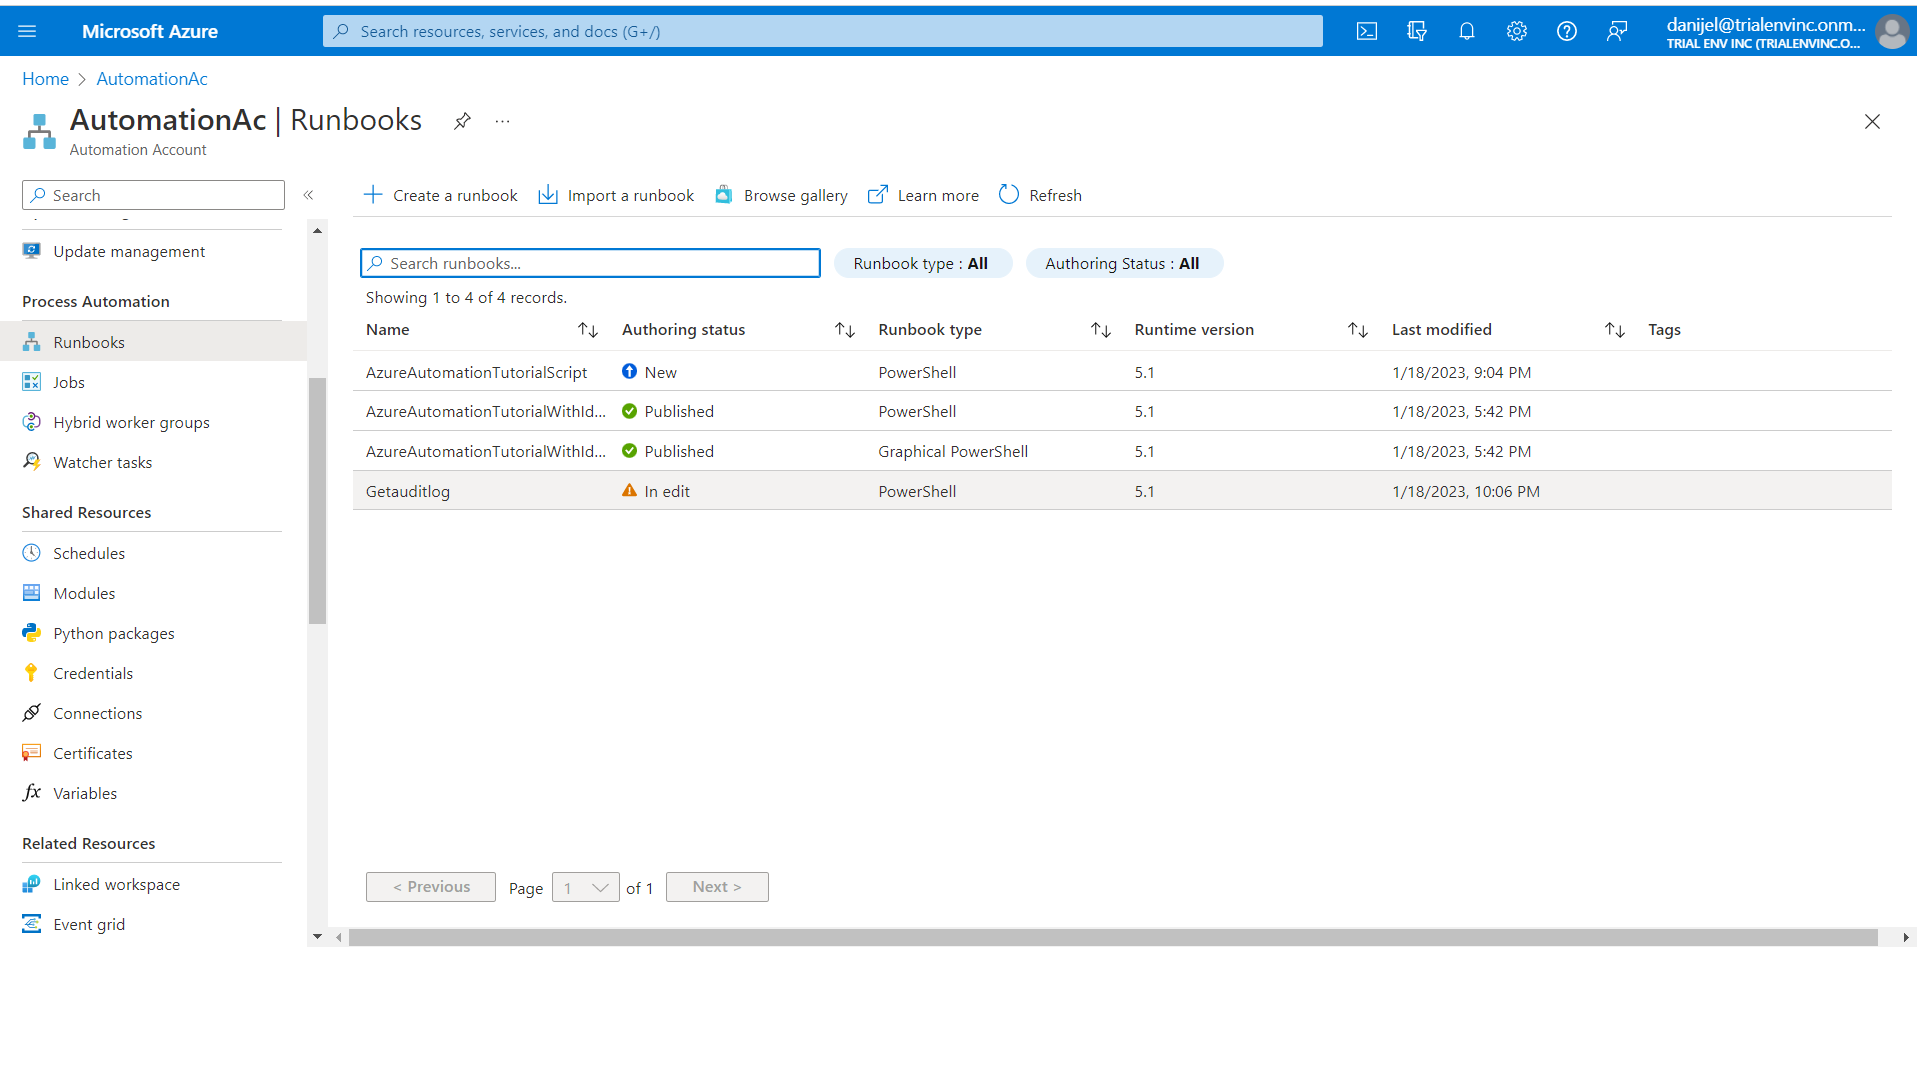
Now we need to create a runbook that will hold the powershell script and run it on a scheduled basis. Select Runbooks and create a new runbook for Powershell or import the runbook if you have some existing powershell code that you want to import.
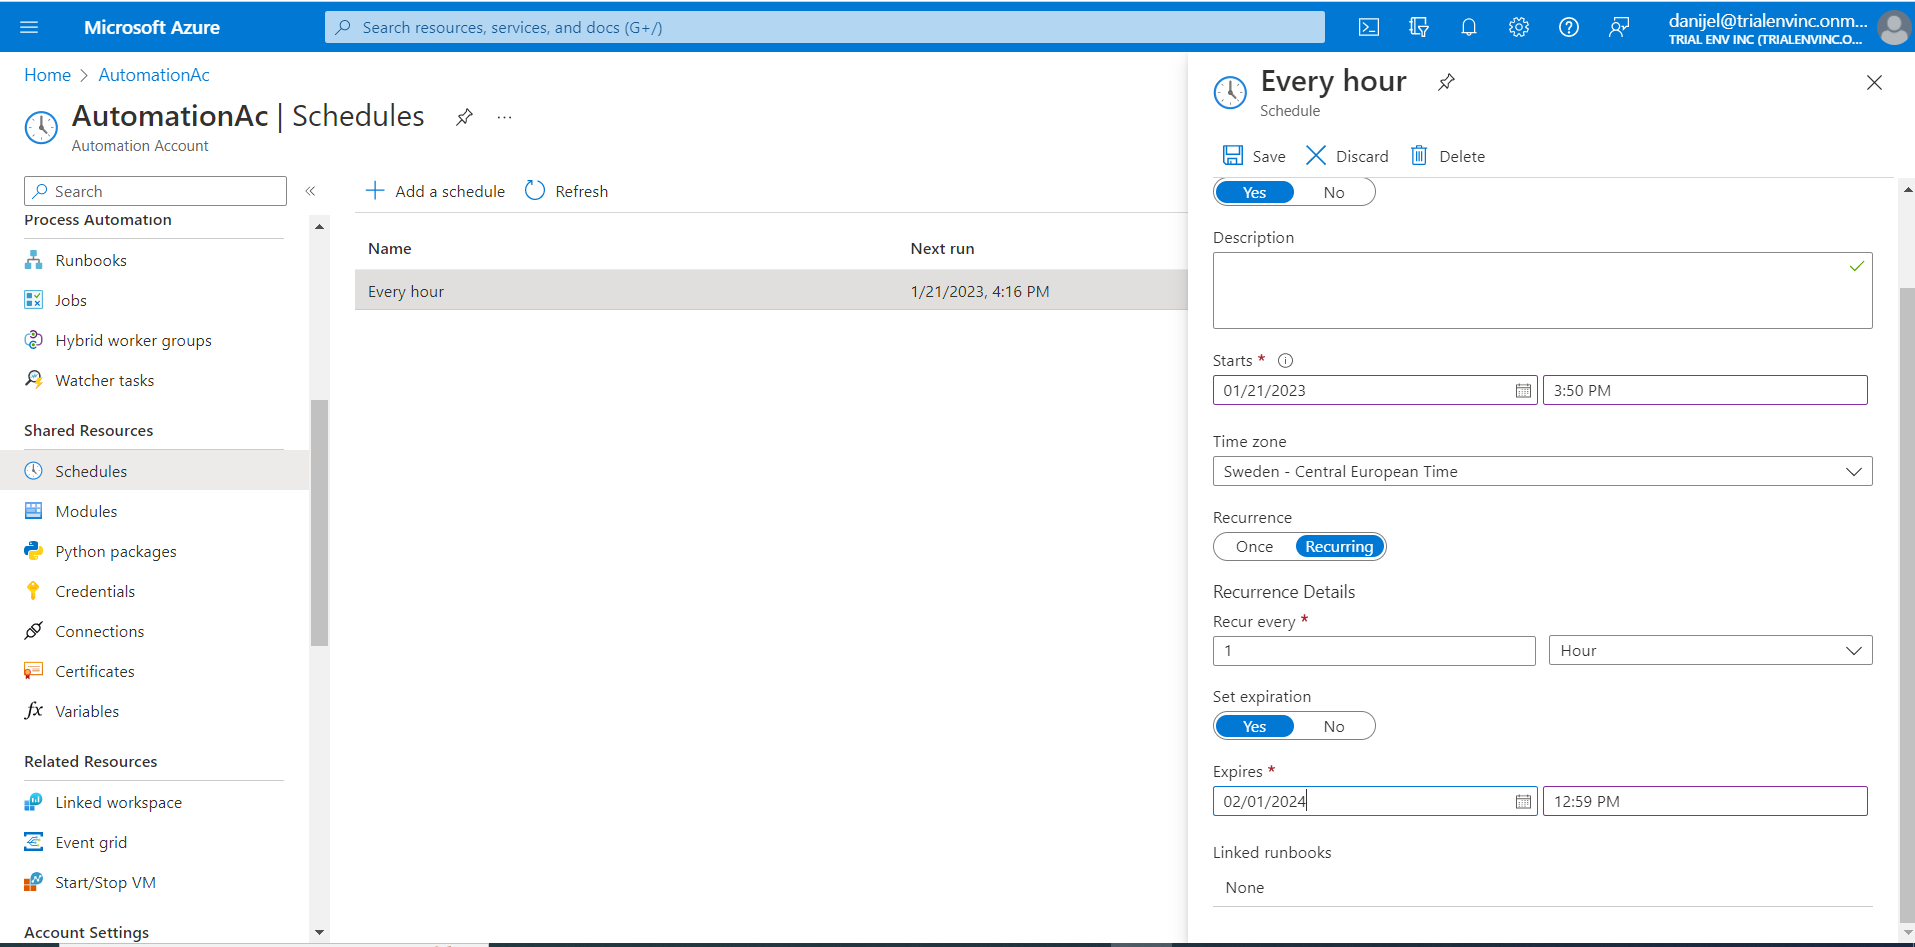
Lastly we will make sure that this job runs every hour so we will create a schedule and link the schedule to our runbook.
5. Visualize data in Power Bi and embed in Dataverse with filter
Visualize data in Power Bi
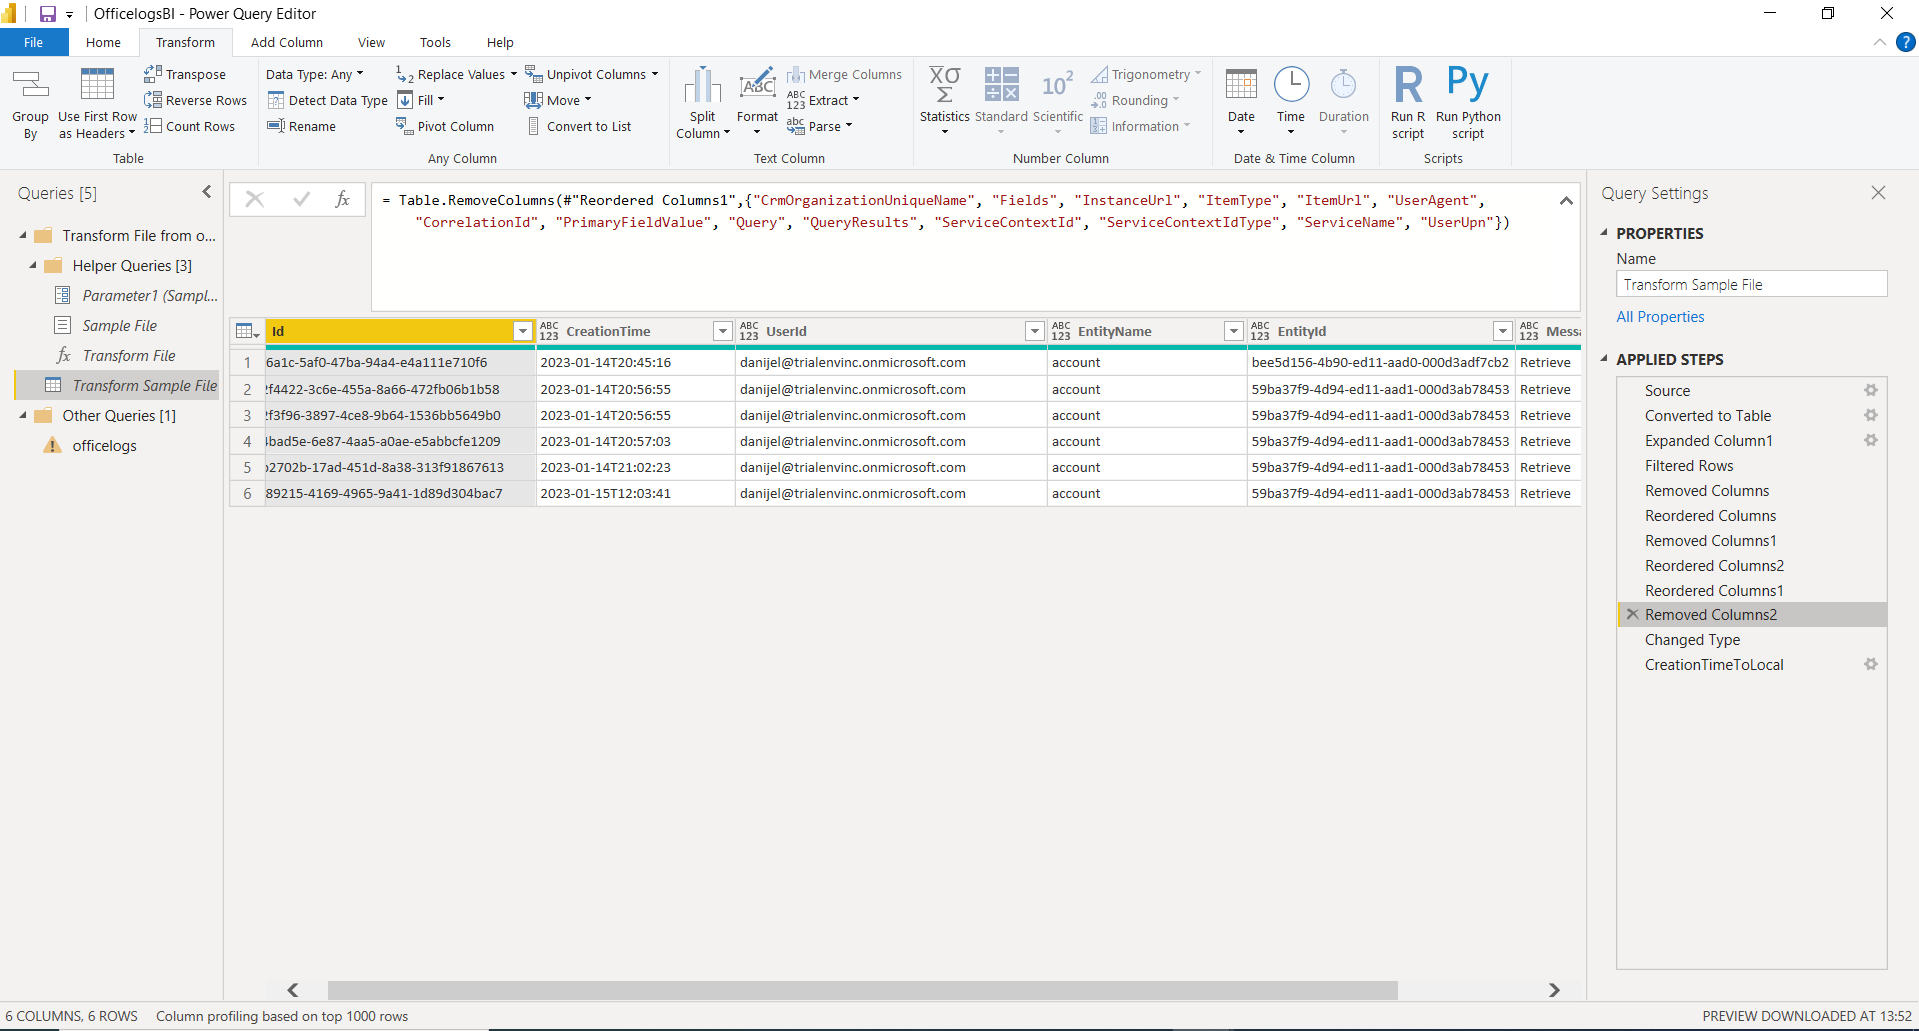
Now that we have a collection of audit log files in our storage account we are going to use Power Bi in order to create a table of the data. We will be able to leverage the filtering functionality inside Power Bi to show the necessary records. Here is a good guide on how to connect Power Bi to your storage account.
When you have selected the right container where your files are stored, next you need to tell Power Bi that all files in this source have the same format and hence can be combined into the same table. Here is a good guide on how to combine files.
Lastly select the fields from the log that you want to visualize to a table. Once done, publish your report.
Embed the Power Bi report in Dataverse with filter on data
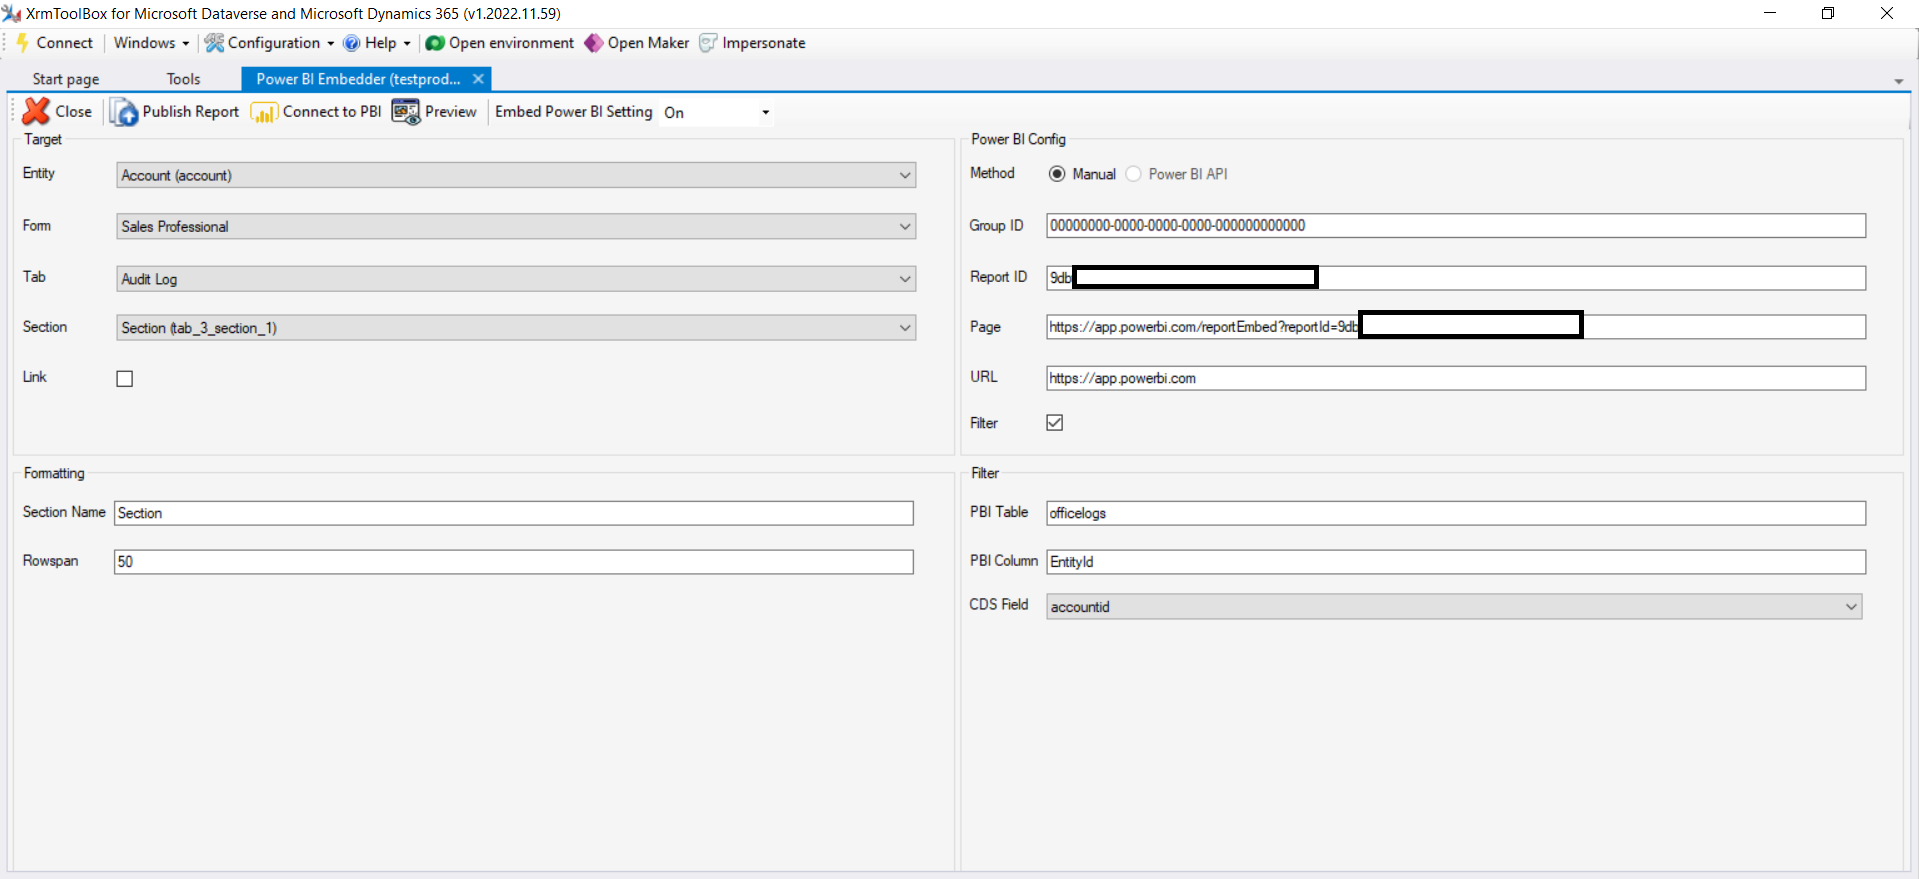
I embedded the BI-report using the excellent Xrmtoolbox-tool called Power Bi Embedder. This is a great tool to use when you want to embed your report inside Dataverse and the best part is, we are able to filter the data shown in the report based on data from Dynamics. For a record in Dynamics, we only want to show Audit logs that are related to just that record. So we will configure Power Bi Embedder so that it only shows audit logs that have the same guid as the record that we are on.
End result
This is the end result inside Dynamics, as you can see, I have added a tab for the report and we are filtering out the audit log so we only show the logs relevant for that particular record. This is a nice way to show the users who have been viewing a specific record inside the system.
Conclusion
So as you can see, the process of setting up this extended audit log is quite cumbersome and involves a lot of different parts and technologies. The end result is quite nice however. I really like how easy it is to integrate Power Bi into Dataverse. Still I believe there might be easier ways to achieve this. In part 2 I will show you readers a different, less cumbersome, way of achieving the same end result. Stay tuned!
If you want to discuss the topic in detail, feel free to contact me on social media.
Cheers!